Left Continue shopping
Your Order

You have no items in your cart

You might like...
£6.99
£4.50 £5.99
OUR WEBSITE ONLY SHOWS A SELECTION OF THE PRODUCTS WE SELL, VISIT OUR SHOP FOR NEARLY 1000 MORE!
Night Scented Plants

Night Scented Plants

Our planting designer Jeremy did a quick Q & A for a local society this week,
focusing on the subject of night scented plants. This is it.

Q: “Why do some flowers smell so good, just in the evenings?”

A: These “night scented” plants know what they’re doing! They produce an
essential oil late in the day that attracts their ideal pollinating partner -
moths. Over thousands of years they’ve worked out that moths hunt at night,
using scent rather than visual cues, to find food. That’s why most night
scented plants have relatively pale flowers - because colour isn’t as
important to them as an attractor - it also makes them stand out better in
moonlight.

Q: “Does the fragrance come from the actual flowers? Please explain.”

A: It’s not just the flower that can produce fragrance. Leaves, roots, buds,
bark, seeds and fruit can also give off scent. Rosemary leaves, ginger roots,
clove buds, cinnamon bark and citrus fruit I guess are the best known
examples I can think of quickly!

Q: “Name 5 varieties that you’d recommend to grow in east London in
Summer? (Thinking of species that look good and give off a lovely aroma in
the evenings)”.

A: Given the number of snails, foxes and cats in east London, I’m going to
give you two top fives - ‘night scented plants’ and ‘best, most snail resistant/
reliable/easy maintenance plants’:

Top Five Night Scented Plants to Grow in East London:
1. Lonicera periclymenum (Honeysuckle)
2. Trachelospermum jasminoides (Star Jasmine)
3. Zaluzianskya ovata (Night Scented Phlox)
4. Dianthus (Pinks)
5. Matthiola longipetala (Night Scented Stock) - sow seed in July for late
summer flowers.

Top Five ‘All-rounder’ Plants to Grow in East London:
1. Geranium ‘Rozanne’
2. Climbing rose ‘Claire Austin’ (by David Austin)
3. Erigeron karvanskianus
4. Fargesia nitida ‘Black Pearl’ (non-invasive, clump-forming bamboo) -
makes an awesome screen or hedge
5. Agastache ‘Black Adder’

Q: “How do fragrant plants affect hay fever sufferers? Are there any varieties
which are kinder for people with that allergy?”

A: It’s not the pollen, but the petals, and as I mentioned, other parts of the
plant, that produce fragrance. Pollen is a whole other ball game. It’s pretty
difficult to find flowers that don’t have pollen because that, of course, is how
they reproduce. What hay fever sufferers can do, is find the beauty in foliage
plants - plants that reproduce differently. Ferns are great. Ironically, some
ornamental grasses are good. Fatsia japonica is great for an instant tropical
feel. It takes a little research, but lovely outdoor spaces for the pollen-
sensitive can absolutely be done.

Q: “Know any interesting facts about plants that smell in the evening?”

A: A few plants - certain arum lilies and the frost tender Stapelia, for
example, take fragrance in an entirely different direction. They smell like
rotting flesh! It’s actually brilliant because this attracts flies, which then
pollinate the plants.


Jeremy Hindmarsh is our senior planting and garden designer. He also writes
our weekly e-newsletter, offering gardening tips and advice. Subscribe at
https://lancastersonline.com

Email: jeremy@lancastersonline.com

Read more
Establishing a Wildflower Border Using Seed

Establishing a Wildflower Border Using Seed

Rewilding and wild gardening have seen a huge increase over the last few years and you'll often walk past cordoned off areas of local green spaces that have been dedicated to creating a wildflower meadow.

We stock wild flower seeds here at the shop, just enough to cover a 10m2 space. Which should be more than enough to create a border in your garden.

Prepping, Sowing and Growing...

Wildflower seeds are best sown either in March or late September.

Remove all weeds and debris, if necessary use an appropriate systematic weed killer. If the area has been overtaken by weeds, it is important to reduce the number of weed seeds in the soil. It may be necessary to allow time for the first flush of weeds to germinate and then remove, before attempting to sow any wildflowers.

Wildflowers prefer poor soil with low quantities of nutrient because rich, fertile soils allow weeds and grasses to out-compete them - do not use compost or fertiliser on the area to be sown. Prepare the soil to a fine tilth once the weeds have been removed, ready for sowing your wildflowers.

Try not to disturb the soil any further as this may bring more weed seeds to the surface. Sow pure wildflower blends like ours at a rate of 3g/m2. It should not be necessary to rake the seed over as the light helps germination on many species.

The rate at which wildflowers appear will vary depending upon species -some annuals may take only a few weeks, while others (perennials) can take several months.

All annual species will flower the same year if sown during the spring or the previous autumn. Perennial wildflower species will establish during the first year of sowing and flower during the second year.

We have blended a combination of annual and perennial species in order to ensure that you get a flush of colour in year one from annuals, allowing perennial species to really shine alongside self-seeded annuals from year two onward.

Maintenance

Keep your flower meadow in good condition, by going over the area with a strimmer at the end of the season, in September or October - after the plants have all finished flowering. Follow up by removing the debris and then mowing the area, cutting down to 15cm or so.
Read more
Top Tips for Looking After Your Christmas Tree

Top Tips for Looking After Your Christmas Tree

These simple rules will help you gain maximum enjoyment from your tree:

  • When you bring your tree home, take it out of its netting as soon as possible. This prevents mould and fungus growing in damp branches.
  • Take it outside and give it a good shake to remove any insects and needles loosened in transit.
  • Saw about 5cm (2”) off the bottom of the trunk and place it in a bucket of water, if you’re not going to put it up immediately. Make the cut perpendicular to the stem axis. Don't cut at an angle or in a ‘V’ shape.
  • Water is the single most important means of looking after your tree. An average sized fresh-cut tree can consume up to four litres (1 gallon) of water in the first 24 hours after being cut; and then up to a 1-2 litres (1/4-1/2 a gallon) every day after that, depending on its size and your home’s heating system.
  • If you have under-floor heating, then your ‘log-based’ tree needs to be placed in a bowl or tray which is always kept topped up with water.
  • Tree stands with a built-in reservoir are the best way to support your tree and keep it watered.
  • Avoid putting your cut tree in sand or soil - this reduces the amount of water it can absorb.
  • Make sure that the water level doesn’t get below about 3cm (1”) from the bottom of the trunk.
  • There is no advantage to drilling a hole into the centre of the base of the trunk - the live part of the trunk is around the edge, just under the bark.
  • Position your tree away from direct heat sources (radiators, direct sunlight, fires, etc.).
  • If your tree is pot-grown, make sure you place its pot on a dish and keep it watered.


If you have any questions, please ask a member of staff. We’re always happy to help.

Merry Christmas!

The Lancasters Team.

Read more
How To Care for your Houseplants in the Winter

How To Care for your Houseplants in the Winter

It’s that time of year again, the nights draw in, the radiators are on and you need at least 5 layers to leave the house. Funnily enough, your houseplants are also well aware of this change.

With less light coming into the house for less of the day, cold draughts from open windows and dry air from central heating, winter poses new problems for the average plant parent. We’ve set out a few things to do and a few things to definitely avoid.

Watering, but not as we know it!

You might’ve noticed it already, but when things get a bit chillier, indoor soils will stay moist for longer than usual. Your plant is starting to enter a dormancy period, so isn’t growing and isn’t as thirsty as usual. The drop in temperature also means that there’s less evaporation taking place.

So instead of looking out for dry plants like in the summer, you need to be looking out for wet ones. Still put your finger into the soil and feel for any moisture; if it’s damp leave it alone for a few days and check again.

At this time of year, it’s much better to give a good drink to a dry plant than a sprinkle little and often. If there's any excess water in the saucer or decorative pot 30 minutes after watering, make sure to pour it away.

(Don't) Feed Me Seymour

As explained above, your plant isn’t as hungry in the winter and won’t need any feeding. So put your houseplants onto a diet and resume their feast around the start of spring in March/April.

If your plant is flowering, you can make an exception to this rule and give it a feed every week or so.


And you thought Goldilocks was fussy...

Be on the lookout for any fluctuating temperatures. Most houseplants are originally from tropical environments and won’t like to be too cold, especially if it comes on them by surprise. Keep them away from any draught ridden corners or windows that stay open for extended periods. They like to sit at around 15c but can go lower providing that they’re not stuck in water.

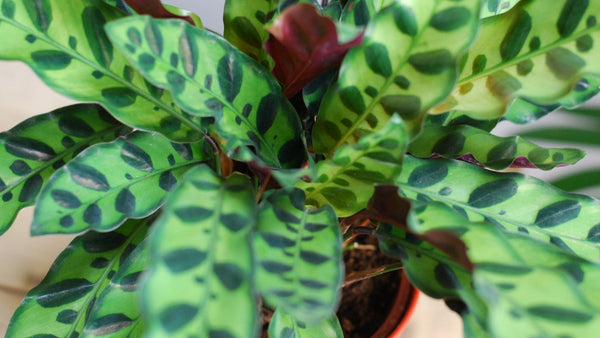
This doesn't mean that they can be left next to a radiator! The dry air that’s pumped out of most central heating systems can be fatal for your floral friend. (We’re looking at you, Calathea) Try and keep them a good few feet from any heat source and provide a morning mist if you can.

Another trick is to place your plant’s pot on a bed of clay pebbles within a saucer, which is then filled with water. This little pool will evaporate and create a faux humidity around the plant.

These rules also stand for under floor heating. Whilst it may not be as harsh on the foliage, it will cause your plant to dry out quicker than usual, so keep an eye on the soil.


A seat belt and a blanket

Speaking of temperatures, if you’re buying plants from us or bringing one round to a loved one as a gift, try to keep them as warm as you can! Hide your new friend in a bag or just keep them sheltered from harsh winds, it’ll stop the journey causing any unnecessary stress.

One last thing!

Light is limited in the winter, so if you can, move your plants towards a window during the day (providing that there’re no draughts or heat sources present). The winter sun is also a bit weaker and is unlikely to cause any sunburn.

Even though they’ll be relaxing until the spring, they’re not dead and still need the basics.


Not too much to remember then. You’ll be fine, trust us.

Jed Waldron
Read more
Growing Asparagus and Rhubarb

Growing Asparagus and Rhubarb

Asparagus

Asparagus is a fabulous thing to grow for yourself. Plants (or ‘Crowns’) can be planted in either autumn or spring. Planting in autumn, when the soil is warmer, offers one main advantage - it gives your crowns a head start in getting established, ready to really go for it in spring. 

How long does asparagus take to grow and how much will each crown produce?

A single row of 6-8 crowns will start to produce a decent crop after two years. Once it’s established, each asparagus crown can produce up to 25 spears a year and will continue to do so for up to 25 years!

Where do I plant Asparagus?

Choose a sunny, well-drained spot. It’s probably going to be in whichever place you choose for a number of years, so bear that in mind when deciding where to put it.

How do I prepare an asparagus bed for planting - and how do I plant the crowns?

  • Asparagus crowns have shallow roots which are easily damaged, so it's important to start with a weed-free bed before you plant, to avoid any damage weeding around them.
  • They like really good drainage, so it’s best planted onto pre-prepared ‘trenches’ around 20cm (10") deep by 30cm (12") wide (you’ll be planting them around 45cm (18”) apart, so work out the length of trench(es) accordingly).
  • Improve the soil you’ve taken out of your trenches by mixing in a few buckets of compost and well-rotted manure.
  • If you have particularly wet soil, mixing in plenty of sharp sand or grit is a good idea at this stage.
  • Put some well-rotted manure in the bottom of your trenches, to help feed the Mound the excavated soil/ compost/grit mix back into the trenches, on top of the manure, to form a narrow ridge over the middle of each trench.
  • Place each asparagus crown on top of the ridge with their roots draped over the Your asparagus plants will need plenty of space in the coming years, so space them out to around 45cm (18") apart.
  • Cover the crowns with 5cm (2”) or so of soil and then firm them into position before watering well and then mulching with a final 5cm (2”) of compost.

    Anything else?

    Just remember to mulch your beds with manure or compost in late winter each year. This will help to deter weeds and add in nutrient to the beds for the season ahead.

    Rhubarb

    • Rhubarb crowns are established plants that are at least one year They’ll produce a crop in the first harvest season after planting, which is much sooner than rhubarb plants that are grown from seed.
    • They’re best planted in autumn or spring, while the soil is warm and moist. 

    • If you’ve grown rhubarb in a pot up to now, this can be planted out at any time of the year, as long as the soil’s not frozen, waterlogged or suffering from drought.
    • Rhubarb grows well in a sunny position with moist, well-drained soil, but it will tolerate semi-shade. It doesn’t respond well to disturbance so the place you choose will need to be a permanent home – somewhere your plants can grow without interruption from year-to-year.
    • Prepare the ground by digging in lots of well-rotted It really does LOVE this stuff! Once you’ve done that, spread out the roots in a planting hole that can easily accommodate the spread out roots - and plant so the tip of the crown is just visible above the soil. If you have more than one crown, space them around 75-90cm (30”-36”) apart. Firm the soil around the crown gently and water well.
    • Rhubarb plants have big root systems so they do require a decent amount of space to But if you use a container and it holds a minimum of 40 litres of compost, you’ll be fine. A soil-based compost, John Innes No 3. mixed with plenty of well-rotted manure, for example, is best for growing rhubarb in a container.
    • Rhubarb has a relatively high water content, so it’s important to water regularly during the growing season.
    Read more
    Starting a Fire with Smokeless Fuel

    Starting a Fire with Smokeless Fuel

    With gas prices rising we’ve seen a lot of people making the decision to switch to solid fuels. Some have never used a coal fire before and others have never used the smokeless alternative, so we've also been answering a few questions in the shop.

    We thought we'd put together a quick and basic guide on how to get a fire started with smokeless fuel.

    Before you get going though, check here to see if you are if you're 'ready to burn'. Only smokeless coal and certain firewood can be burnt in smoke controlled areas, which includes the majority of the postcodes we deliver to.


    What you’ll need:
    1. First, sweep the grate clear of old ash/debris. Smokeless fuel burns from the bottom up so you'll need the air to circulate efficiently.

    2. Lay out one or two firelighters roughly in the middle of the grate.

    3. Collect a bunch of kindling and build it evenly around the firelighters, creating a chamber by placing some over the lighters, but leaving enough space for a match to get through.

    4. Take your safety matches and ignite the firelighters.

    5. Once the kindling starts to burn on its own, gradually shovel in one or two scoops of smokeless fuel, making sure you don’t smother the flame.

    6. The kindling wood should burn long enough to create a hot airflow and alongside the open flames, should cause the smokeless fuel to ignite.

    7. Leave the fire to settle, you’ll notice that after a while the centre becomes visibly hot.

    8. Homefire products such as the Smokeless Coal and Ecoal50 should produce a nice flame, but if you’re looking to create a dramatic open fire, many people add a log or two after it's reached this maximum temperature. (This in't advisable if you're using an open fireplace/chimney)

    9. If you're using a fireguard, make sure you keep it in place, no matter how long you’re leaving the fire for.

    10. Enjoy the fire and warmth!
      Jed Waldron
      Read more
      Spring Flowering Bulbs

      Spring Flowering Bulbs

      Nothing lights up the garden better than spring bulbs – they provide a burst of colour before most perennials, trees and shrubs have got going. Spring bulbs are one of the first signs of longer, brighter days to come. With a bit of planning, you can enjoy colour from bulbs from February right through to June. They come back year after year too!


      Spring bulbs are planted in autumn. They can be planted directly into borders and most grow very well in pots, making them perfect for patios and smaller gardens.


      Bulbs generally need to be planted at a depth of around three times their size. They usually need sun or partial shade and free-draining soil (although see Camassia below), so if your soil is very heavy, incorporate some horticultural grit when planting.


      Plant as many spring bulbs as you can afford – they really do look best planted en masse, whether in the ground or in pots.


      Most spring bulbs are perennial and will come up year after year if the conditions are right (tulips are the exception – while some may flower for a few years, they’re best topped up every autumn for the best display). Always allow the foliage to die back completely before removing it – this feeds the bulb for next year’s display. If you’re growing them in pots, give
      them a liquid feed after flowering to help feed the bulb for next year - and
      store the pot somewhere cool over summer. Alternatively, dig the bulbs up after flowering and replant somewhere in the garden.


      Here are a few of our favourites:


      Snowdrops (Galanthus) are the first bulbs to flower, usually in February. They flower whatever the weather – even in snow. Grow in moist, well- drained soil in partial shade – they look particularly good under shrubs and trees. Snowdrops can also be grown in pots.


      Carpets of Crocus flowers are a highlight in the garden from late winter onwards. They also provide a much-needed source of nectar and pollen for pollinating insects just emerging from hibernation. Crocuses are easy to grow and are well-suited to growing in pots or at the front of borders and naturalising in grass. They like a sunny spot.


      Daffodils (Narcissus) brighten our gardens throughout spring. There are many different varieties, some flowering as early as February and others as late as early May. Daffodils range in height from about 10cm up to
      45cm and come in a variety of colours and forms. In addition to the usual yellow, flowers can be white, cream or lemon, with trumpets of contrasting shades. Some are scented. They grow brilliantly in pots and look great in borders.


      Grape hyacinths, Muscari, have flowers that look like a cross between a bunch of grapes and miniature hyacinths, in April and May. They’re known for their flowers in brilliant shades of blue, but white, pink and purple varieties are also available. They look good at the front of a border, naturalised in grass or under deciduous shrubs. They spread easily so if you don’t want them to do this, grow them in pots or window boxes.


      Tulips are perfect for adding spring colour to borders in April and May and also grow very well in pots. They’re technically perennial, but years of breeding to get the most beautiful blooms means that many varieties only flower reliably for one year. Many gardeners plant new bulbs each autumn to ensure a good display. If you’re growing tulips in pots, you really need to plant fresh bulbs each year, just to be sure.


      Alliums flower in May and June, bridging the gap between spring and summer perfectly. Loved by bees, the beautiful pompom flowers on tall stems come mostly in shades of purple, but also pink and white. They look fantastic threaded through a border – grow as many as you can for the most stunning effect. Grow alliums in moist but well-drained soil in full sun.


      Camassias produce tall spires of star-like flowers in late April, May and early June. They come into their own at a time of year when many spring bulbs have finished flowering and early perennials are yet to flower.
      Unlike many spring bulbs, Camassias will grow in heavy, moist soils, so they’re a good choice for areas of your garden where other spring bulbs may not thrive. Completely hardy, they come back year after year. Bees love the flowers, and they’re largely untroubled by slugs and snails. However you plant them, plant generously, as they look best grown en masse, creating a haze of colour in a similar way to bluebells.

      Read more
      Houseplants in 90s US Sitcoms

      Houseplants in 90s US Sitcoms

      Houseplants might be all the rage now, but we didn’t start this fire. Many people will remember indoor nature in the 70s and 80s, with Yucca plants and ‘Mother-in-law’s Tongues’ hanging around in many homes. Some may even remember as far back as the 50s or 60s when Monstera and Spider Plants were at the height of fashion.

      For most generations though, there’s a period that we’re all too familiar with, either because you lived it or you smashed through Friends on Netflix.

      Many of our favourite US Sitcoms from the 90s feature houseplants that we know, love and stock here at Lancasters. So we decided to pick out a few of our favorites and name the plants, all in the name of providing some home décor inspiration and indulgent nostalgia. Aren't we nice?

       The Fresh Prince of Bel Air


      Right at the start, first airing September 1990 we have the Fresh Prince of Bel Air. With an instantly recognisable theme song and a lovable Will Smith, it’s truly one of the greatest. Below you can see the original set from the early seasons and quite a few plants. The one that stands out amongst them all and can also be seen in later episodes is the Kentia Palm on the left.


      Kentia palms had a big revival in 1980s and early 90s USA, mostly due to the popularity of tropical/beach styles (think Miami Vice), a perfect fit for Will's Bel Air mansion. It's an ideal plant for almost any home as it’s relatively low maintenance, only needing a bright room and some water when the top inches of soil are dry.

       Seinfeld


      Another sitcom that launched a now hugely successful comedians’ career, though Jerry's character was way too clean to have any plants in his apartment. If you’ve seen this groundbreaking comedy, you're familiar with the lovable ‘hipster doofus’ Kramer’s apartment. One plant that reappears throughout the series 9 year run is a Red Maranta on his table.


      We’ve always stocked Marantas here at Lancaster’s because they’re easy to look after and are a great trailing version of their big cousin the Calathea. Usually when they come in to us from the grower they’re in the early stages but from the looks of it, Cosmo Kramer has had his one for a little while and it has began to trail. Yet more inspiration from the style king of the sitcom world.

       Friends


      Larry David, co-creator of Seinfeld, described Friends as the same show as his, just with better looking people. Whatever the writers at Friends did, it worked. The main setting of Monica’s apartment gives a snapshot of 90s fashion and is immortalised in TV history.


      Either side of the TV you can spot two plants, on the left we have a Boston Fern and on the right is a Pothos of some kind. Two very classic plants that pay homage to 1970s style. They’re also very easy to take care of, even for a TV set (if they’re real).

      Neither plant needs an abundance of light, the only thing you’d need to do is make sure that the Boston Fern’s soil is kept moist, but never soggy. You can also give it a regular mist to keep the foliage healthy. For the Pothos, just give it a drink when the top layers of soil have dried.

       Boy Meets World


      One that’s lesser known on this side of the water but still recognisable to most who grew up in the 90s is Boy Meets World. In the still below we can see the main set from the left, allowing us to spot two plants that are still very popular today. 


      On the left there's another Pothos, which looks like it’s probably a Devil’s Ivy. To the right there's a Fiddle Leaf Fig which is, in truth, quite a dramatic plant. They like to be kept relatively warm, moist and in a bright position but can still often drop leaves, which causes panic.

      If your plant does start shedding, step back and assess why it’s happening rather than acting straight away. It could just be because the weather has turned colder. Good luck!

      Jed Waldron
      Read more
      Onions and Shallots 28/01/21

      Onions and Shallots 28/01/21

      A ‘set’ is just a small, immature bulb, harvested prematurely from the previous year’s crop, which is used to grow more onions and shallots.

      The great thing about sets is that they produce crops quite a bit earlier than seed-started ones, so using a combination of seed-started and onion sets will provide you with a plentiful supply across more of the year. If you have a small vegetable patch, it might be worth considering just growing from sets, because the earlier harvest will allow you to then plant something else in their place for later in the year - or even the following year (Pak Choy or Swede, perhaps). You can also plant seedlings and sets in autumn, to grow through winter for spring harvest. Plant in spring and autumn and you’ll have a year-round supply.

      As a general guide, spring-planted shallots take around 20 weeks to develop; autumn-planted more like 36 weeks.

      Like onions, shallots prefer sun and a moisture-retentive, fertile soil, ideally with plenty of well-rotted manure and compost.

      Shallots: Plant sets with the tips just showing. Space them 15-20cm apart and leave 30cm between rows.Cover them with fleece or netting to stop birds pulling them up - just until their root systems have established. Give them a real kick-start with a spring feed of liquid seaweed fertiliser. As with all veg., water is key.

      Onions: Plant sets 10-15cm apart with the tips just showing. They like the same conditions as shallots and again, it might be worth considering fleece or netting to protect your sets from wildlife for a few weeks. Harvest when they’re big enough to eat or when the leaves above ground have turned brown and started to wither.

      Sow onion and shallot seeds indoors as early as January, so that the plants are big and strong enough to plant out into the garden in spring. Sow seeds in a tray of seed compost (which must be kept moist) about a centimetre apart. When the seedlings are a few inches tall, separate them out really gently and replant individually in small pots with fresh multi-purpose compost. Plant these out into the garden in late March/April with about 10-15cm between them (and 30cm between rows). Again, remember to water them!

      As always, of course, if you have any questions, please feel free to get in touch with us and we’ll do all we can to help.

      The Lancasters Team.

      Read more
      Heat Loving Crops 22/01/2021

      Heat Loving Crops 22/01/2021

      There are enough people across the internet who can tell you how to sow seeds, so we won’t add to the noise (our go-to reference for matters garden-related is almost always the Royal Horticultural Society). There are, however, a few crops that need as much time as possible to grow, develop and ripen (i.e. the longest season possible). They like heat which, let’s face it, is in pretty short supply for most of the year here in the UK, so it’s best to get them going indoors, in the latter part of January, to give them that time to then provide you with great food in abundance later in the year. Tomatoes, chillies, aubergines and sweet peppers are the ones we’ve mentioned here. There are others.

      Get these seeds started indoors, on a light, warm window sill, work top or shelf - away from draughts. You’ll be growing them on indoors when they get a bit bigger too - in larger pots (around 8cm is good) - so they’ll be beautifully established, robust and ready for planting out into the garden when the soil has warmed up and the last frost of the year is just a memory.

      For all of these heat-lovers, sow them in a little propagator or seed tray, as you would most seeds - in proprietary seed compost. Have some larger pots (or a tray of them) ready to move them into in a few weeks - and away you go.

      Isla Haxton on the ‘Walthamstow Gardening Tips’ Facebook group knows her tomatoes, if that’d be helpful for you.

      As always, of course, if you have any questions, please feel free to get in touch with us and we’ll do all we can to help.

      The Lancasters Team.

      Read more
      22 results